Create your own configurator
1. Enabling the configurator
Go to the product page
Find the configurator tab at the bottom

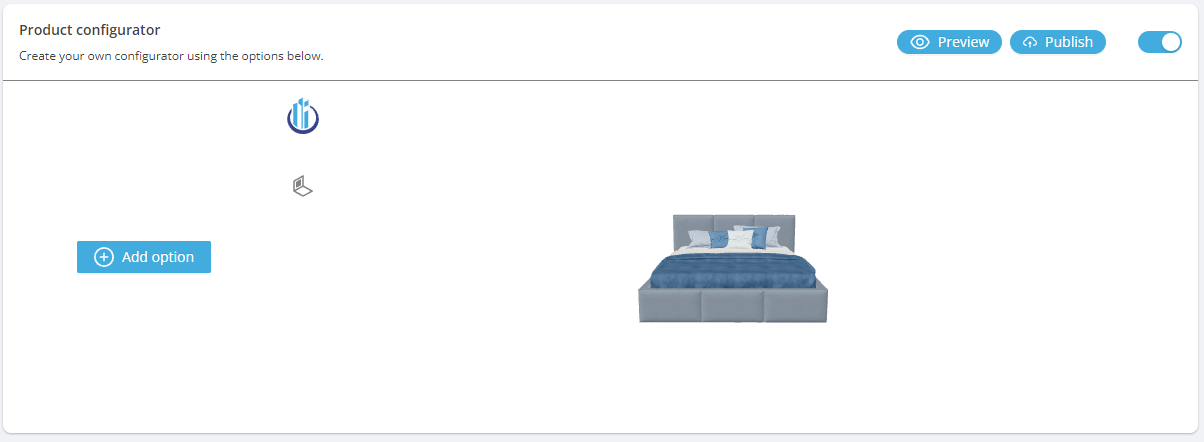
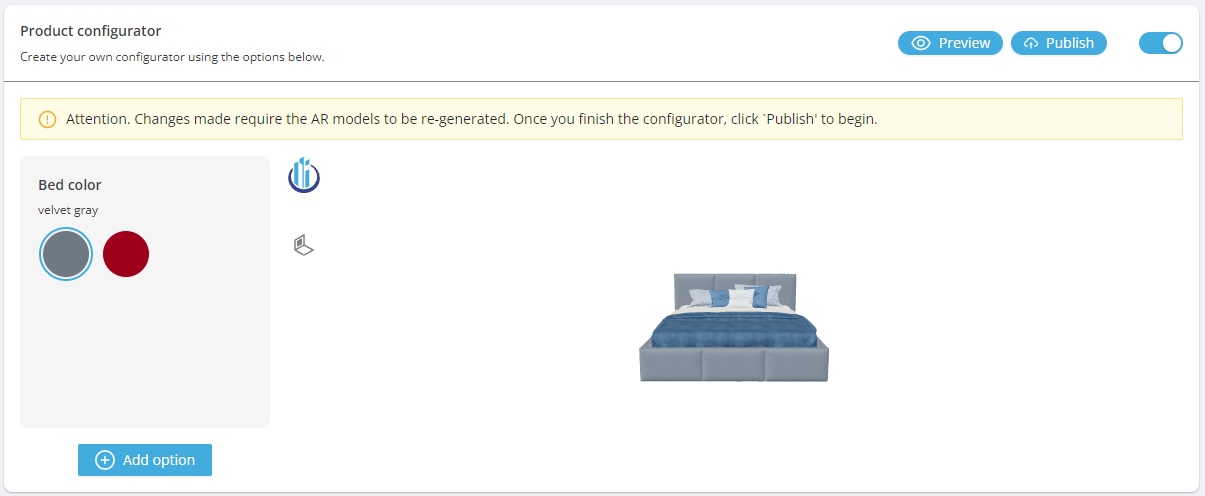
2. Configurator window
Choose Add Option
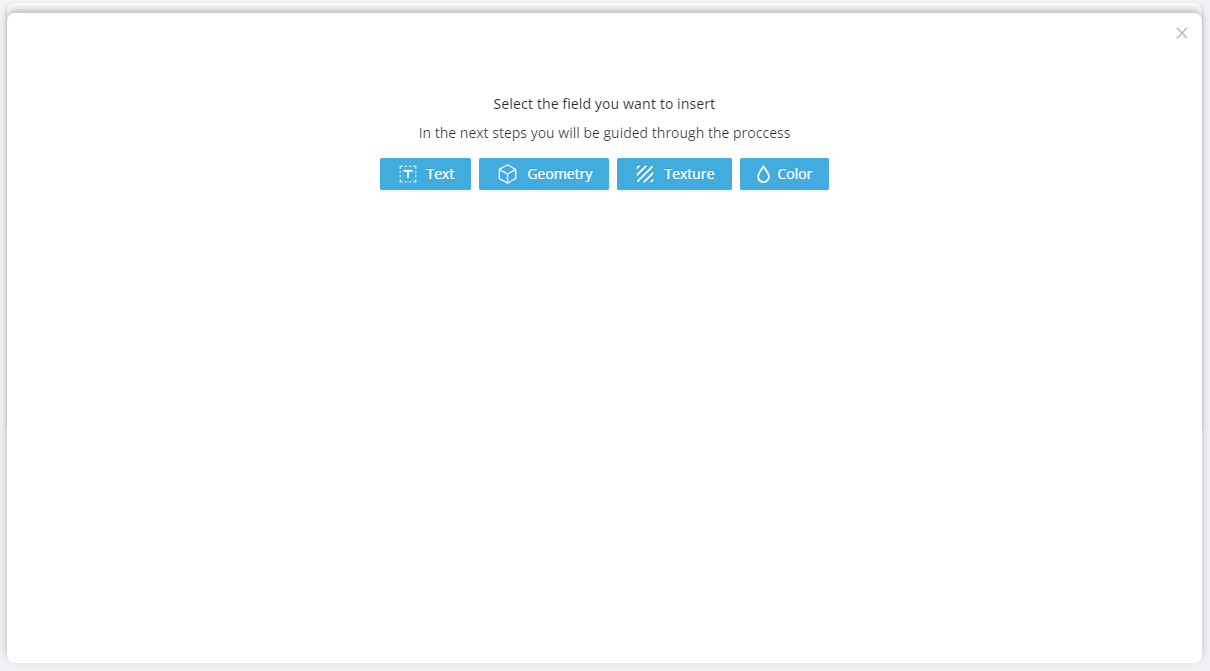
3. Model modification type
Choose how you want to modify the model
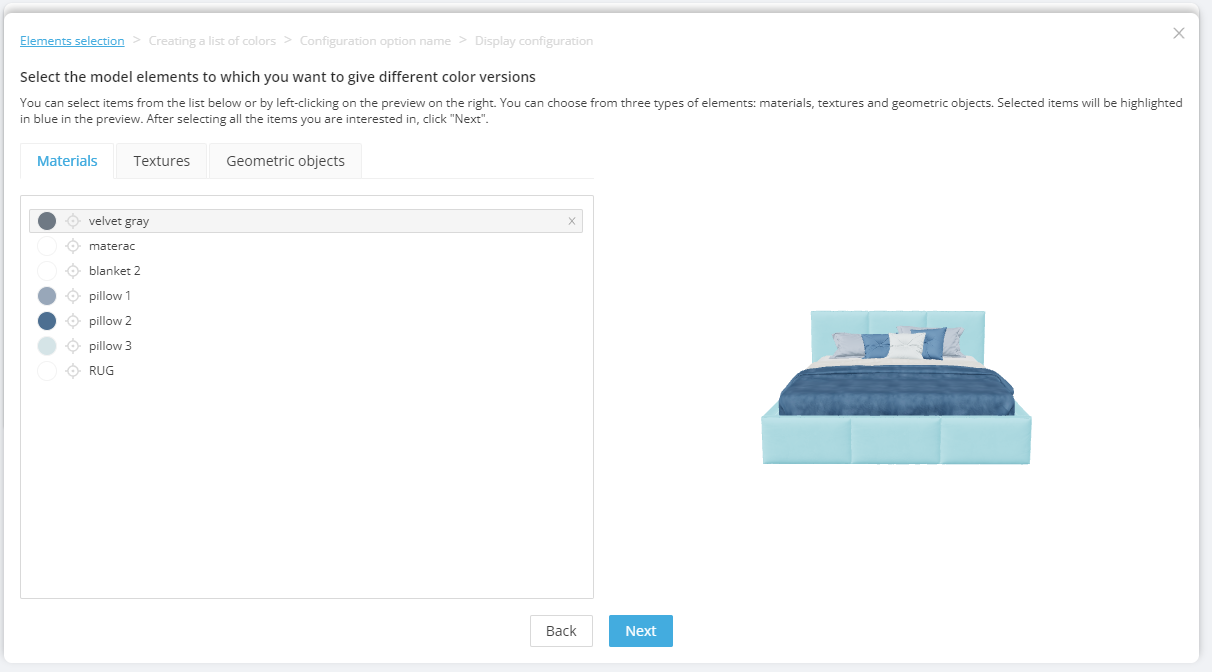
4. Choose element
For the Geometric, Texture or Material options, select the object to be modified
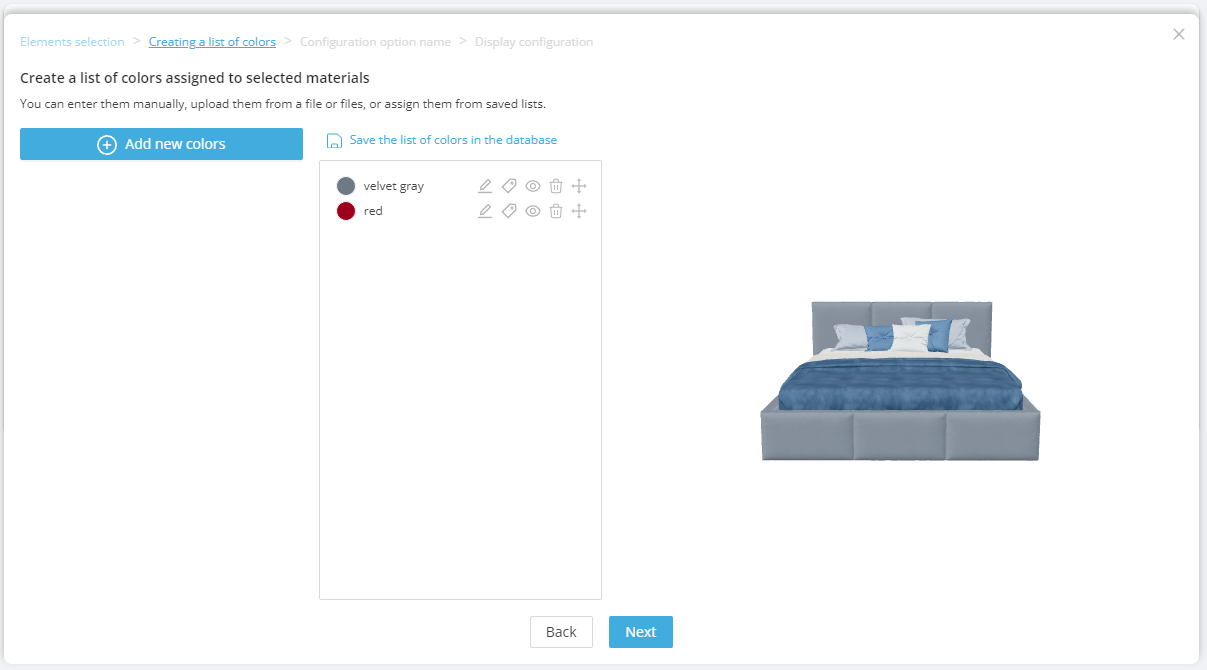
5. Determining the appearance of the change
Choose the color of the previously selected element
Optionally, you can rename the option
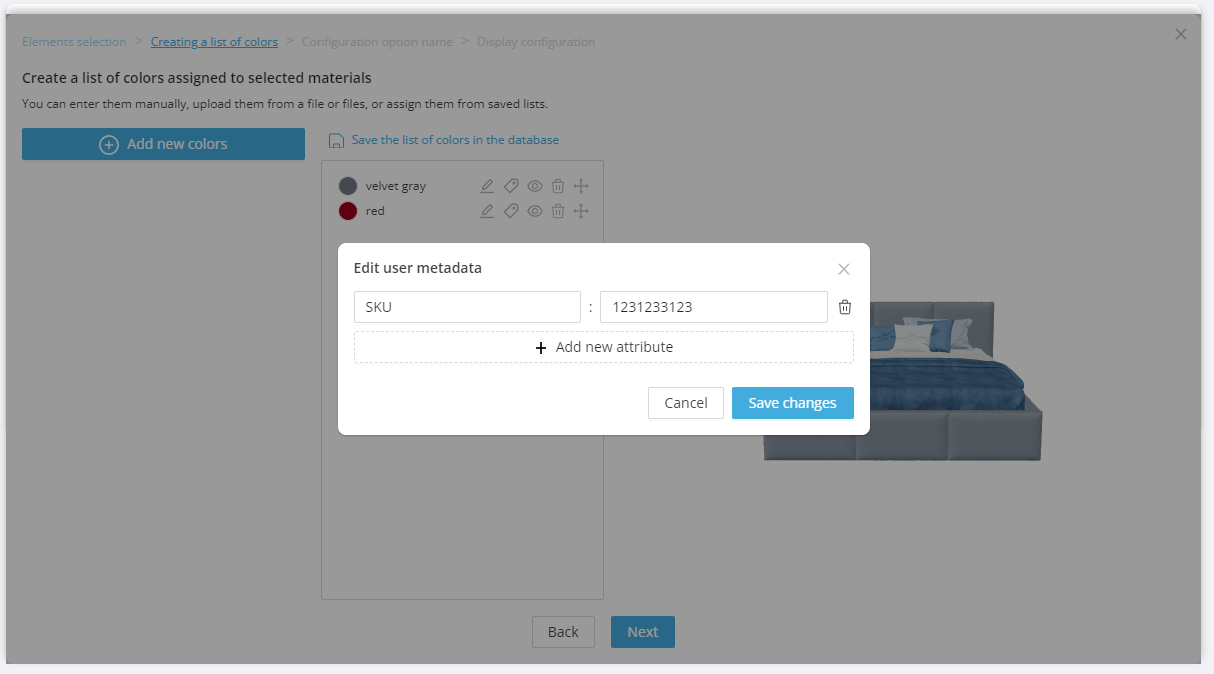
6. Add user metadata
By clicking on the tag icon next to the color option, you can add your own metadata to it, such as the product SKU.
In this way, you can easily integrate the configurator with your own store. To find out more see an example
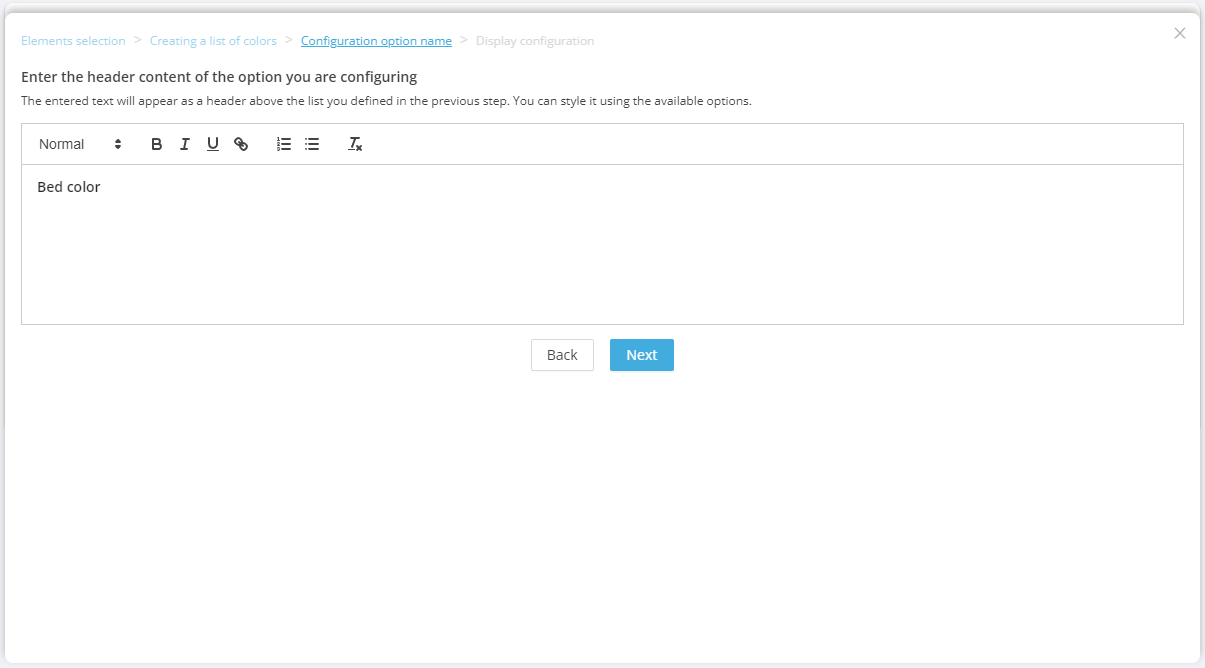
7. Give the section a name
Enter the title of the change that the user will see. the content should indicate what will be changed, e.g. Color od the bed
8. Customize the options view
You can modify the appearance of the option by selecting the size, color and shape of the option box
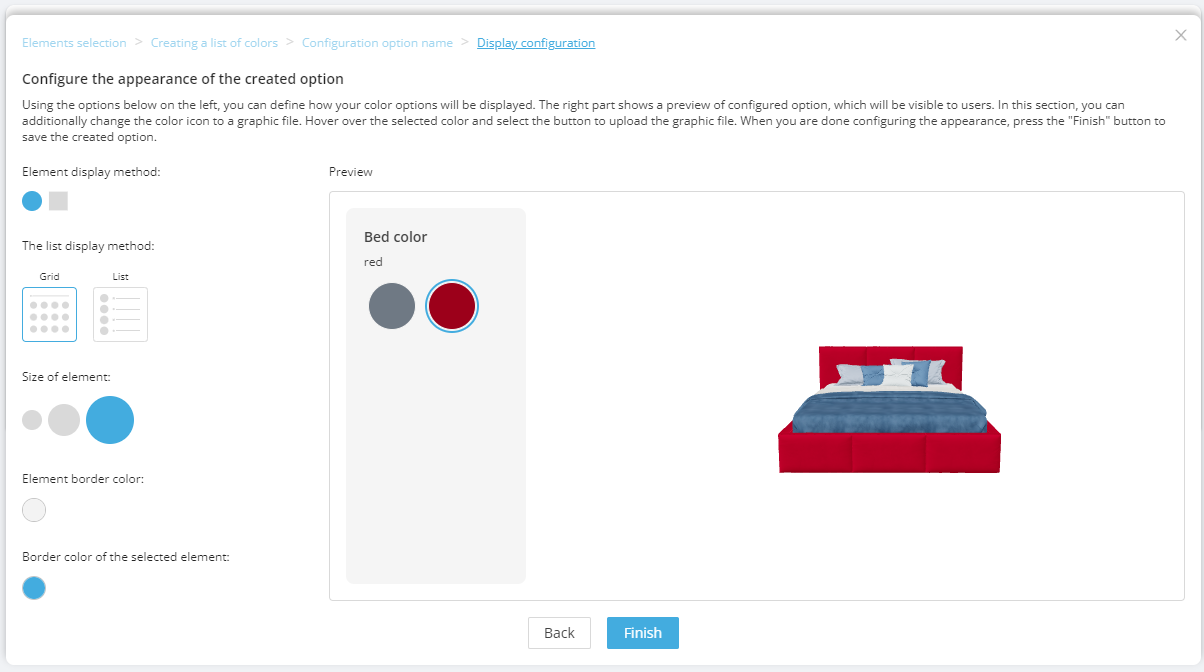
9. Check the effect of the change
Now you can check how the change affects the model when selected
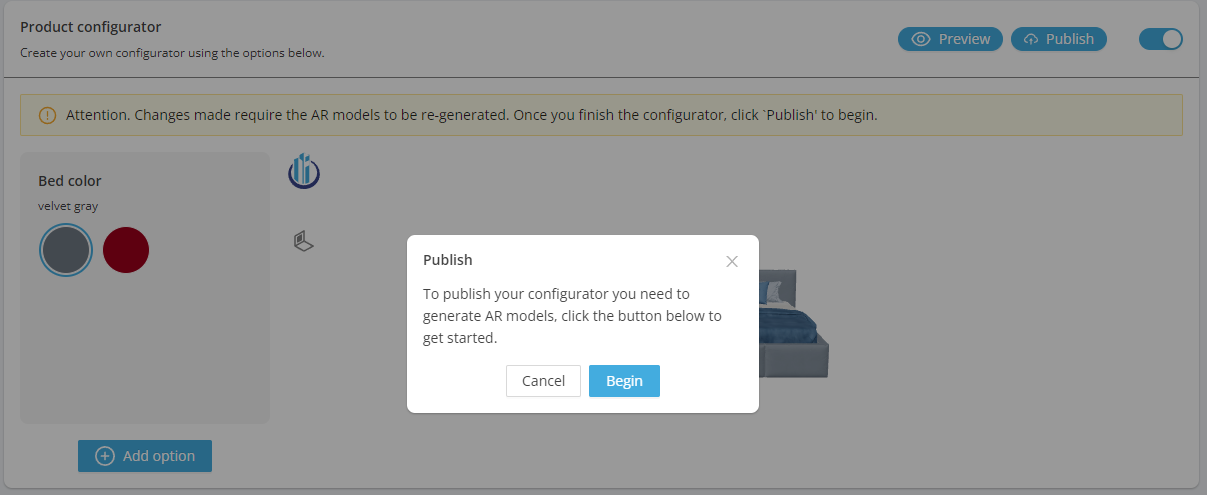
10. Publication part 1
Press the Publish button and then Begin
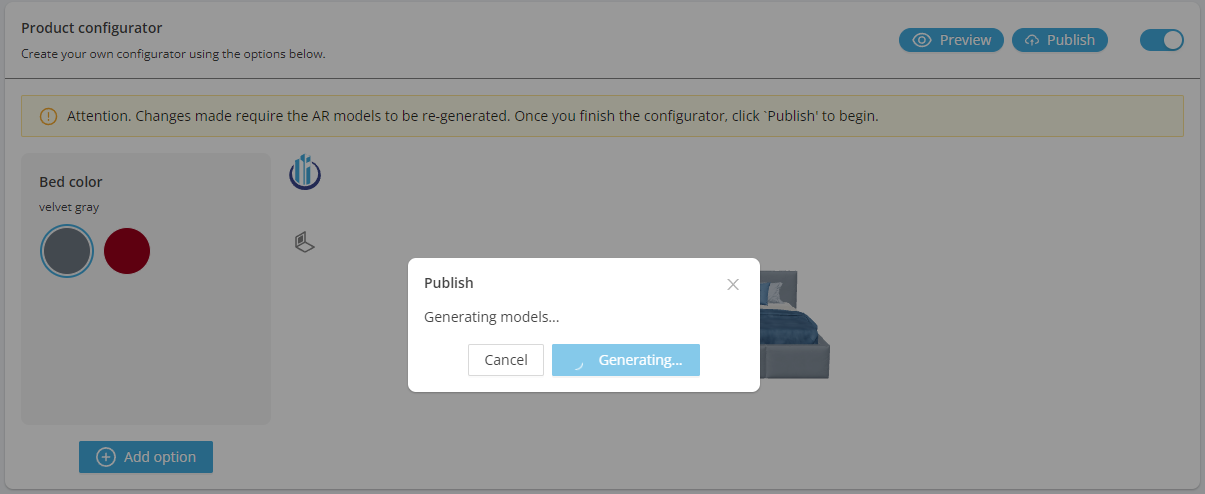
11. Publication part 2
Wait for the model generation
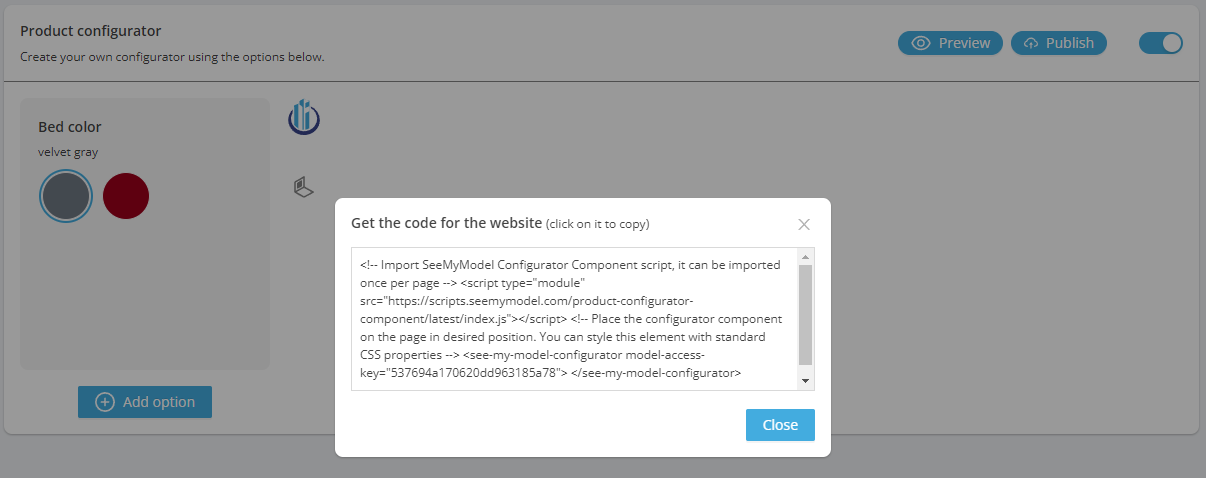
12. Publication part 3
Copy the received code and paste it as html on your website.